
java开发
JDBC
JDBC全称Java DataBase Connectivity。
JDBC再进行sql查询的步骤如下1
2
3
4
51.注册驱动(如mysql的驱动)
2.进行数据库连接,获取连接对象
3.获取sql语句执行对象
4.执行sql语句
5.释放资源(直接close即可)
注册驱动(如mysql的驱动)
注册驱动有两种方法1
2
3DriverManager.registerDriver(new com.mysql.cj.jdbc.Driver());
Class.forName("com.mysql.cj.jdbc.Driver")
一种是直接使用驱动管理器DriverManager的registerDriver的方法来注册驱动,而另一种是直接使用forName来加载com.mysql.cj.jdbc.Driverr这个类。
可以发现其类的static块调用了DriverManager.registerDriver(new Driver());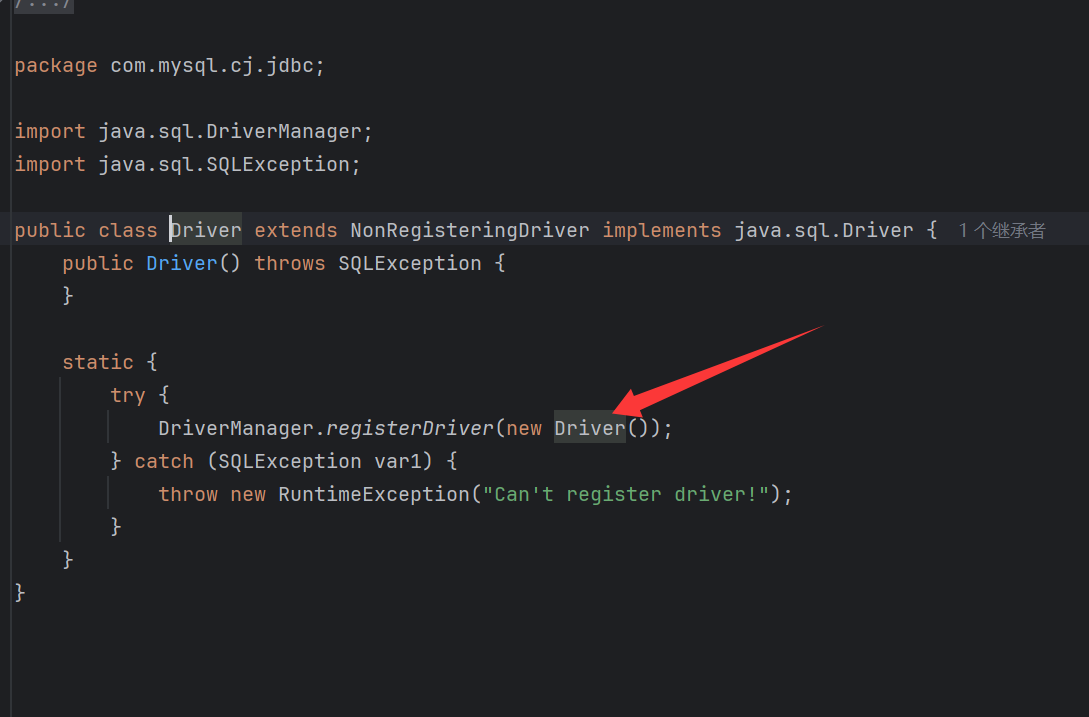
所以这两个从本质上其实没区别。
DriverManager
DriverManager 是 Java JDBC(Java Database Connectivity)API 的核心类之一,它负责管理数据库驱动并协调应用程序与数据库之间的连接。以下是其核心作用和工作原理的详细解析:
一、DriverManager 的核心作用
| 功能 | 说明 |
|---|---|
| 驱动注册 | 维护一个已注册的 JDBC 驱动列表(如 MySQL、PostgreSQL 等数据库的驱动) |
| 连接路由 | 根据 JDBC URL 的格式(如 jdbc:mysql://...)自动选择匹配的驱动来建立连接 |
| 连接管理 | 提供统一的接口(getConnection())创建数据库连接,隐藏底层驱动差异 |
二、工作原理
1. 驱动注册机制
自动注册(JDBC 4.0+):
驱动 JAR 包中的META-INF/services/java.sql.Driver文件声明驱动类全名,DriverManager在首次调用时自动加载这些驱动。1
2# 示例:MySQL 驱动 JAR 中的声明文件
com.mysql.cj.jdbc.Driver手动注册(旧版本兼容):
通过Class.forName("com.mysql.cj.jdbc.Driver")触发驱动的静态代码块注册。
2. 连接建立流程
1 | // 示例:获取 MySQL 连接 |
- 解析 URL:
DriverManager遍历所有已注册驱动,找到能识别jdbc:mysql://前缀的驱动(如 MySQL 驱动)。 - 创建连接:匹配的驱动实例调用
connect()方法,与数据库建立 TCP 连接并完成认证。 - 返回 Connection 对象:封装数据库连接的 Java 对象,用于后续 SQL 操作。
三、关键方法
| 方法 | 说明 |
|---|---|
static Connection getConnection(String url, String user, String password) |
根据 URL、用户名、密码获取数据库连接 |
static void registerDriver(Driver driver) |
手动注册驱动(通常不需要直接调用) |
static void deregisterDriver(Driver driver) |
从注册列表中移除驱动 |
static Enumeration<Driver> getDrivers() |
获取所有已注册的驱动实例 |
进行数据库连接,获取连接对象
我们使用DriverManager的getConnection来进行数据库的连接
DriverManager.getConnection(String url, String user, String password)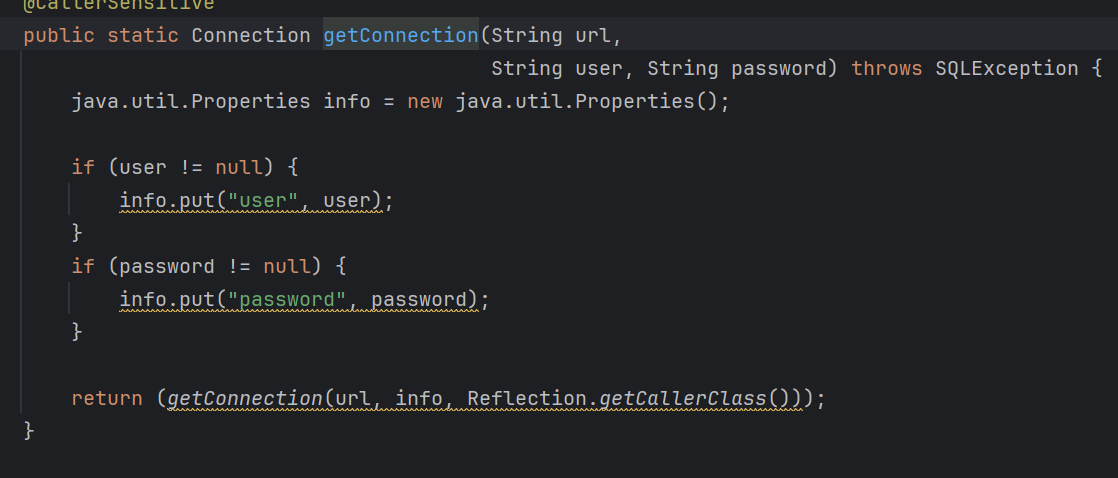
其url的结构为1
2
3jdbc:+数据库类型+://+地址+/+数据库名
如
jdbc:mysql://127.0.0.1:3306/web
1 | Connection connection= DriverManager.getConnection("jdbc:mysql://127.0.0.1:3306/web","root","root11"); |
获取命令执行对象
jdbc存在存在三种命令执行对象
| 对象 | 核心用途 | 安全性 | 性能 |
| :———————— | :———————— | :———- | :———————- |
| Statement | 静态 SQL | 低 | 低(无预编译) |
| PreparedStatement | 动态参数化 SQL | 高 | 高(支持预编译) |
| CallableStatement | 存储过程/函数调用 | 高 | 依赖数据库逻辑 |
我们常用的是Statement和PreparedStatement,PreparedStatement是支持预编译的。1
2
3Statement stmt=connection.createStatement();
PreparedStatement preparedStatement=connection.prepareStatement("insert into user values(?,?,?)");//sql预编译
执行sql语句
Statement
Statement sql语句的主要操作函数有如下三个1
2
3executeQuery() //执行select查询语句
executrupdate() //可以执行insert,update,delect,CREATE,之类的
execute() //执行任意语句
1 | stmt.executeQuery("Select database()"); |
PreparedStatement
PreparedStatement其sql语句是在其获取命令执行对象时就以及写入了预编译语句。其要进行sql执行只要对其参数进行传入即可1
2
3
4input=2
PreparedStatement psmt=connection.prepareStatement("Select * from Users and where id=?")
psmt.set(1,input)
psmt.executeQuery()
整体代码\
Statement
1 | package JDBC; |
PreparedStatement
1 | public ResultSet SelectByName(String name) throws ClassNotFoundException, SQLException { |
在jdbc查询时返回的是ResultSet这个接口类
我们想查看这个查询结果就需要使用,getString,getInt来获取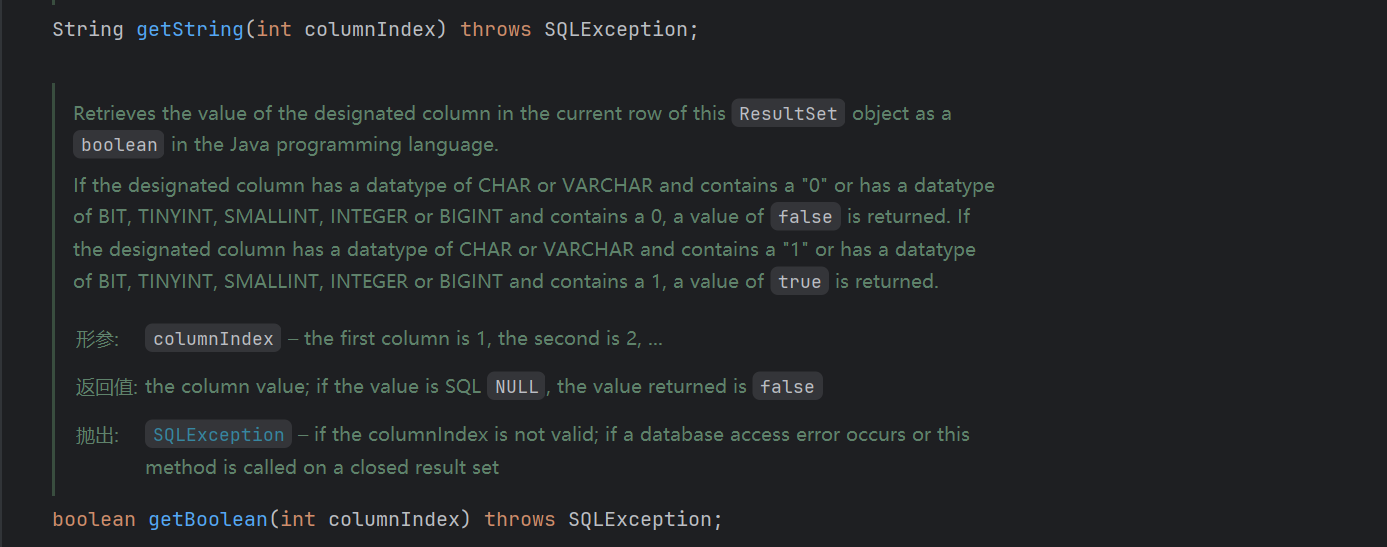
1
2
3
4
5
6
7
8
9
10
11
12
13
14
15
16
17package lse.kaifa;
import JDBC.Mysql_Test;
import java.sql.ResultSet;
import java.sql.SQLException;
public class test {
public static void main(String[] args) throws SQLException, ClassNotFoundException {
ResultSet res= sql.SelectByName("LSE");
res.next();
String name = res.getString("username");
String password = res.getString("password");
System.out.println(name + "\n" + password);
}
}
需要注意的是我们所得到的ResultSet类的实例,其初始的索引是不在第一行的,我们想获取内容需要使用next使得索引内移
增删改查
1 | //Mysql_Test.java |
MyBatis的使用
MyBatis是一个基于JDBC包装简化sql查询编写的组件。
我们可以将上面较长的代码编写成如下一小段
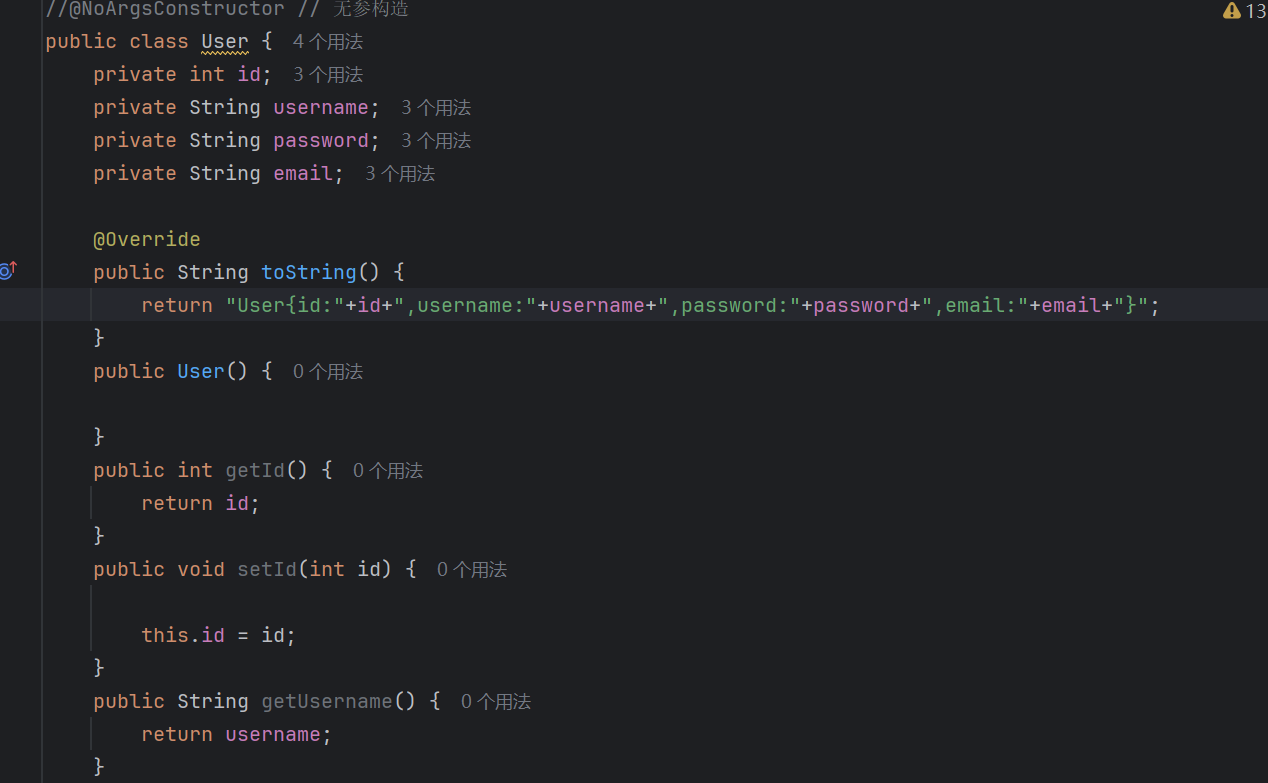

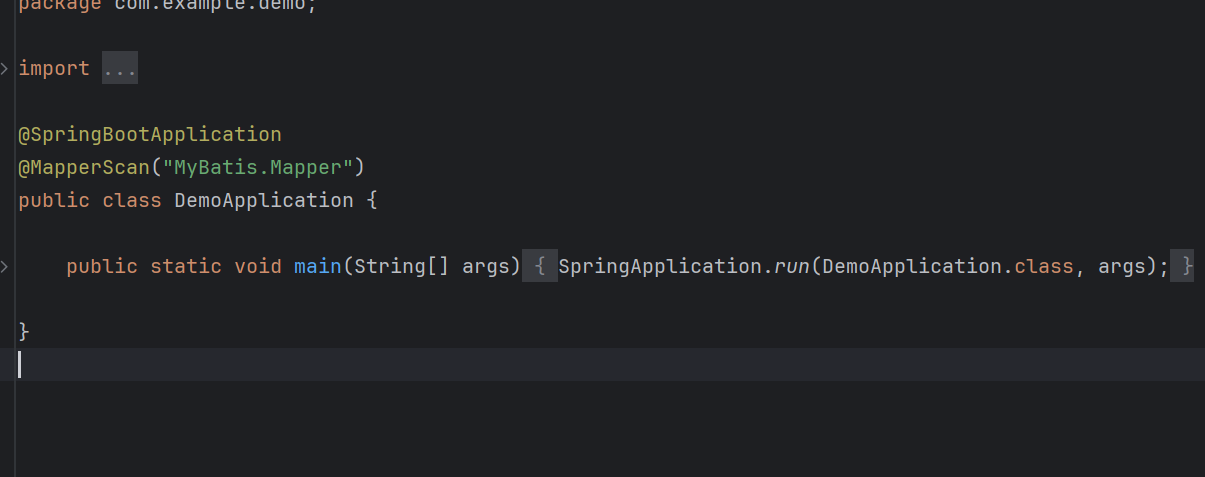
我们只要编写好一个接口,写上Mapeper,Mapper
Scan这些注解,一个User类,和配置好连接配置,就可以调用sql查询了。
编写的整体代码
1 | package MyBatis; |
调用
在Mybatis的调用中,因为我们使用的是springboot包装的,所以我们没法再mian中调用,spring是可以再service和Controller 中调用MyBatis的,这里我直接使用单元测试类。来测试1
2
3
4
5
6
7
8
9
10
11
12
13
14
15
16
17
18
19
20
21
22
23
24package com.example.demo;
import MyBatis.Mapper.UserMapper;
import MyBatis.User;
import org.junit.jupiter.api.Test;
import org.springframework.beans.factory.annotation.Autowired;
import org.springframework.boot.test.context.SpringBootTest;
import java.util.List;
class DemoApplicationTests {
private UserMapper userMapper;
public void SelectAllUser() {
List<User> list =userMapper.selectAllUsers(1);
list.forEach(user -> System.out.println(user));
}
}
@Autowired是Springboot的注解作用是注入bean,其实就是注入对象。
我们在前面编写Mapper时使用了一个@Mapper的注解这个注解,的作用是标记这个接口。在应用程序启动时其依赖 MyBatis-Spring 和注解@MapperScan来生成动态代理。(@MapperScan 会扫描指定包下的接口,并为其生成代理对象。)
我们使用@Autowired注入的就是这个动态代理对象,即我们的private UserMapper userMapper的userMapper是这个动态代理对像

这个单元测试其实就是启动了springbootr
#{id}与${}
这个其实之前就有接触过,#是预编译而$则是直接替换
日志
我们可以通过在配置文件中添加1
mybatis.configuration.log-impl=org.apache.ibatis.logging.stdout.StdOutImpl
其会使得mybatis运行的sql语句在控制台输出
我们也可以从日志中看到预编译的过程
增删改查
Mybatis的增删改查和前面的查询操作差不多,就是使用注解不同
@insert
1 | package MyBatis.Mapper; |
在我们使用mybatis传入多个值的时候需要使用@Param(“password”)标记我们的遍历,因为MyBatis 在未使用 @Param 注解时,会将方法参数按位置命名为 arg0, arg1, arg2(JDK 8+ 未开启 -parameters 编译参数)或 param1, param2, param3。
如果没有使用@Param就会抛出xxx not found
@update
差不多1
2
3
4
5
6
7
8
9
10
11
12
13
14
15
16
17
18
19
20
21
22
23
24
25
26
27
28
29
30
31
32
33
34
35
36
37
38
39
40
41
42
43
44package MyBatis.Mapper;
import MyBatis.User;
import org.apache.ibatis.annotations.*;
import java.util.List;
public interface UserMapper {
public List<User> selectAllUsers(int id);
public int insertUser( String username, String password, String email);
public int updateUser( String username, String password, int id);
}
package com.example.demo;
import MyBatis.Mapper.UserMapper;
import MyBatis.User;
import org.junit.jupiter.api.Test;
import org.springframework.beans.factory.annotation.Autowired;
import org.springframework.boot.test.context.SpringBootTest;
import java.util.List;
class DemoApplicationTests {
private UserMapper userMapper;
public void UpdateUser() {
int i =userMapper.updateUser("lalala","123456",3);
System.out.println("修改"+i+"条");
}
}
Delete
也差不多使用@Delete来删除1
2@Delete("Delete from users where id =#{id}")
public int deleteUser(@Param("id")int id);
xml配置
XML配置有几个规范
xml放在资源文件夹里,xml下的包名和接口的包名相同,xml文件名和接口类的文件名相同
xml的mapper中的namespace值为mapper接口的全类名
xml映射文件的select语句中的id值和方法名相同,还得规定返回类型1
2
3
4
5
6
7
8
9
10
11
12
13
14
15
16
17
18
19
20
21package MyBatis.Mapper;
import MyBatis.User;
import org.apache.ibatis.annotations.*;
import java.util.List;
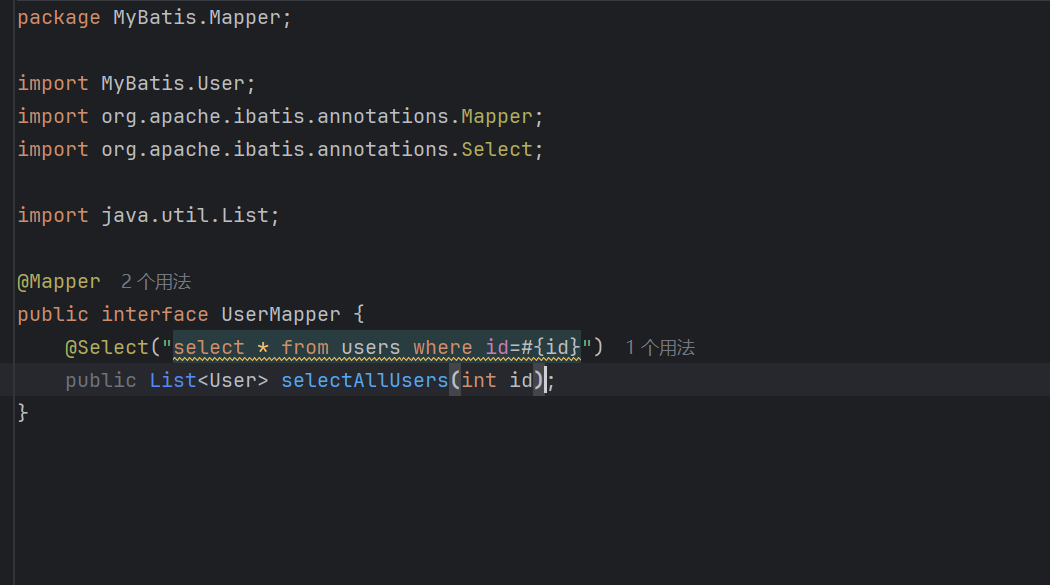
@Mapper
public interface UserMapper {
public List<User> selectAllUsers(int id);
}
//UserMapper.xml
<?xml version="1.0" encoding="UTF-8"?>
<!DOCTYPE mapper PUBLIC "-//mybatis.org//DTD Mapper 3.0//EN" "http://mybatis.org/dtd/mybatis-3-mapper.dtd">
<mapper namespace="MyBatis.Mapper.UserMapper">
<select id="selectAllUsers" resultType="MyBatis.User">
SELECT * FROM users where id =#{id}
</select>
</mapper>
下面来解释一下<mapper namespace="MyBatis.Mapper.UserMapper">的意思是映射的类为namespace的值
而select标签其实就是注解中脑洞@Select如果是@Updat就用update标签
id就是方法名,resultType就是返回类型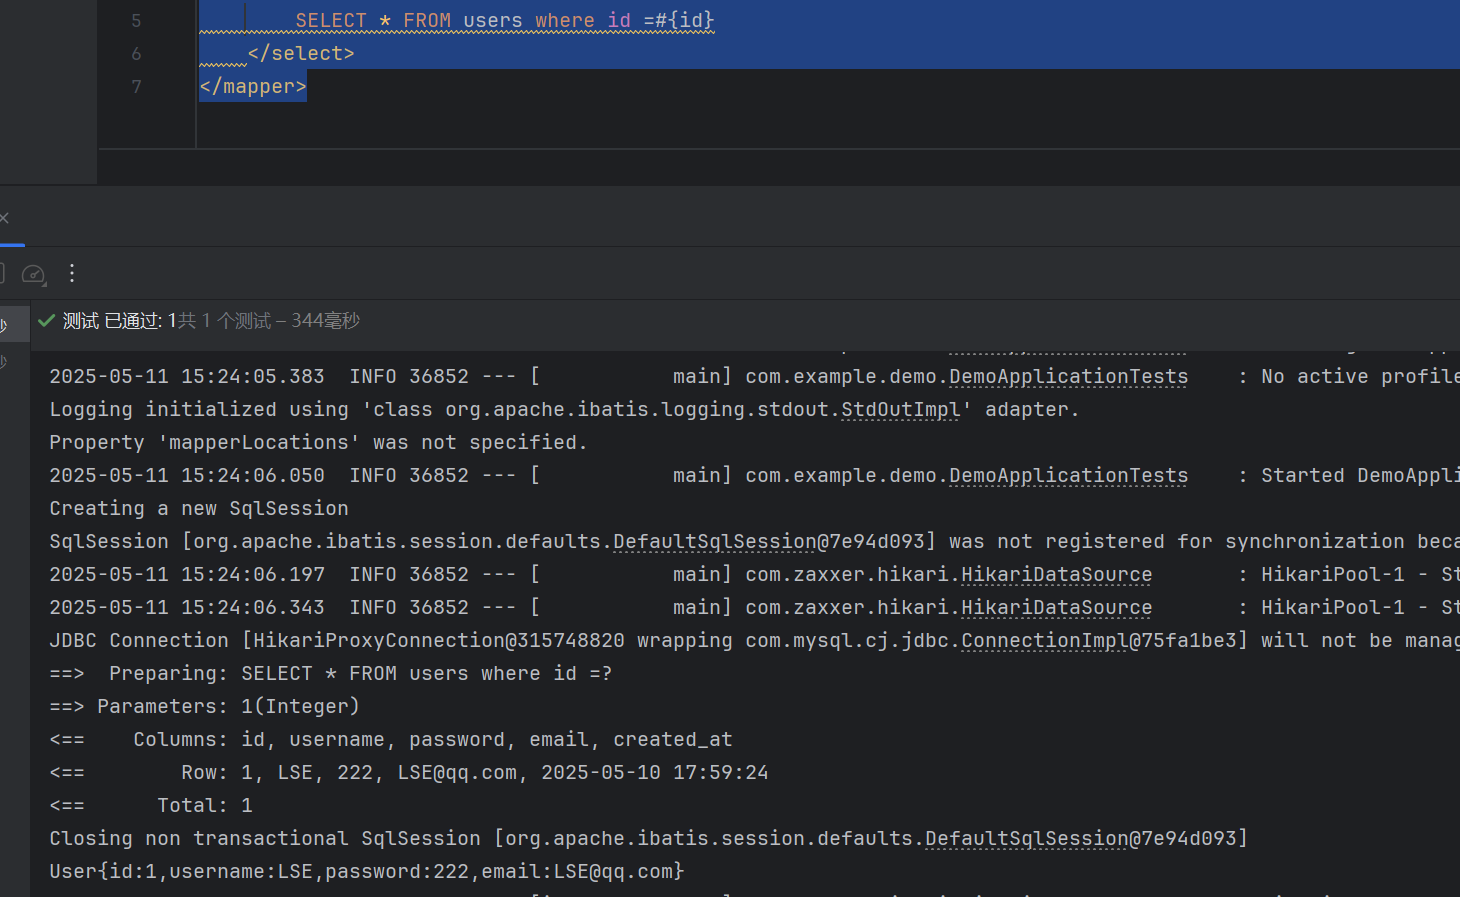
三层架构,ioc,di
首先简单说一下三层架构吧
简介三层架构
三层架构也就是Contorller,Service,dao,分别是控制器,业务逻辑层,数据处理层。将我们的代码分为这三层可以很好的对我们的项目进行维护。
高耦合低内聚
耦合性也就是不同层之间的关系,而内聚就是层内代码的关联度,而不同层中要尽量低耦合这样在不同层修改时可以做到层与层之间影响最小
代码
我们来看下面这个三层结构的代码1
2
3
4
5
6
7
8
9
10
11
12
13
14
15
16
17
18
19
20
21
22
23
24
25
26
27
28
29
30
31
32
33
34
35
36
37
38
39
40
41
42
43
44
45
46
47
48
49
50
51
52
53
54
55
56
57
58
59
60
61
62
63
64
65
66
67
68
69
70
71
72
73
74
75
76
77
78
79
80
81
82
83
84
85
86
87
88
89
90
91
92
93
94
95
96
97package com.LSE.Controller;
import com.LSE.Service.UserService;
import com.LSE.dto.User;
import org.springframework.beans.factory.annotation.Autowired;
import org.springframework.web.bind.annotation.Mapping;
import org.springframework.web.bind.annotation.RequestMapping;
import org.springframework.web.bind.annotation.RestController;
import java.util.List;
public class UserController {
public UserService userService;
public List<User> Users(){
List<User> list = userService.findAll();
return list;
}
}
package com.LSE.dto;
import lombok.AllArgsConstructor;
import lombok.Data;
import lombok.NoArgsConstructor;
public class User {
public int id;
public String username;
public String password;
public String email;
public String created_at;
}
package com.LSE.Mapper;
import com.LSE.dto.User;
import org.apache.ibatis.annotations.Mapper;
import org.apache.ibatis.annotations.Select;
import java.util.List;
public interface UserMapper {
List<User> findAll();
}
package com.LSE.Service;
import com.LSE.dto.User;
import java.util.List;
public interface UserService {
public List<User> findAll();
}
package com.LSE.Service;
import com.LSE.Mapper.UserMapper;
import com.LSE.dto.User;
import org.springframework.beans.factory.annotation.Autowired;
import org.springframework.stereotype.Service;
import java.util.Collections;
import java.util.List;
public class UserServiceimpl implements UserService {
public UserMapper userMapper;
public List<User> findAll() {
List<User> list = userMapper.findAll();
return list;
}
}
我上面的代码较为不错的展示了三层架构,其中还用到了ioc和di这个知识点也就是AutoWired这个注解。
如果没有这个注解我们的代码应该是将1
2
3
4 @Autowired
public UserService userService;
改为
public UserService userService=new UserServiceimpl;
也就是要用到new来实例化方法,这就导致我我们代码之间的关联度增加了,也就是当我们service层的代码改变如类名改了我们的Contorller层就得改。这时候就要友人ioc和id了
ioc与di
这两个的全称为Inversion of Control(控制反转)和 Dependency Injection(依赖注入)
ico的作用就是将我们类的bean传到容器中,DI的作用就是将我们容器的bean注入到变量里
这样添加一个容器我们就可以降低各个层间的耦合度
ioc
我们在springboot中可以使用@Component来对我们要传入容器的类进行标记。这样在程序启动时就会自动将其传入容器
当一帮不使用这个而是使用如下的
注解
| 注解 | 作用 | 示例 |
|---|---|---|
@Component |
通用注解,标记一个类为 Spring 管理的 Bean | @Component public class UserService {} |
@Service |
语义化注解,用于业务层(Service 类) | @Service public class UserServiceImpl {} |
@Repository |
语义化注解,用于数据访问层(DAO 类) | @Repository public class UserDaoImpl {} |
@Controller |
语义化注解,用于控制器层(Web 请求处理) | @Controller public class UserController {} |
@Configuration |
标记一个类为配置类,定义 Bean | @Configuration public class AppConfig {} |
@Bean |
在配置类中定义 Bean 的方法上使用 | @Bean public DataSource dataSource() { ... } |
2. DI(依赖注入)的注解
2.1 自动注入
| 注解 | 作用 | 示例 |
|---|---|---|
@Autowired |
按类型自动注入依赖(默认优先匹配类型) | @Autowired private UserService userService; |
@Qualifier |
按名称指定注入的 Bean(配合 @Autowired 使用) |
@Autowired @Qualifier("mysqlUserDao") private UserDao userDao; |
@Primary |
标记优先注入的 Bean(解决同一类型多个 Bean 的冲突) | @Primary @Service public class DefaultUserService {} |
@Resource |
按名称注入(JDK 原生注解,支持 name 属性) |
@Resource(name = "userDao") private UserDao dao; |
@Inject |
按类型注入(需依赖 javax.inject,类似 @Autowired) |
@Inject private PaymentService paymentService; |
冲突
当一个接口有多个bean时就可能对造成bean冲突,这时候我们就需要使用@Primary和@Qualifier()来进行注入
bean的名称默认是类首字母小写
2.2 注入方式
直接注入
1 |
|
构造器注入
1 |
|
setter方法注入
1 |
|
3. 组件扫描与配置
| 注解 | 作用 | 示例 |
|---|---|---|
@ComponentScan |
指定 Spring 扫描 Bean 的包路径(通常用于主类) | @ComponentScan("com.example") |
@Profile |
指定 Bean 的生效环境(如 dev、test、prod) |
@Profile("dev") @Service public class MockUserService {} |
@Conditional |
条件化注入(根据条件决定是否创建 Bean) | @Conditional(OnCloudCondition.class) |